<< Previous Next >>
In this post we are going to be looking at making a multi pass shader, and I can hear you say
“What exactly is a multi pass shader?”
So, up until now we have been looking at single pass shaders, so the vertices are passed into the render pipeline, and the shader applies one vertex (we don’t have to write this with a surface shader) and one surface shader to the vertex data passed.
With a multi pass shader, the shader resends the vertex data to the render pipeline and applies the next pass of functions to the vertex data.
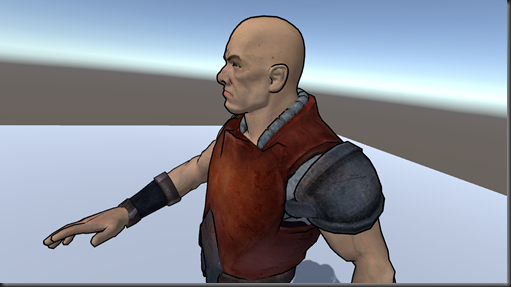
In the image above, in the first pass we call the same methods we did for our diffuse shader, so a simple lighting model and a simple surface shader, in the second pass we execute the code to draw the toon like outline you can see.
Creating multiple passes in a surface shader is as simple as adding another CGPROGRAM section, the order you create the passes is the order of execution. There is a little more to it for vertex & fragment shaders, but we will cover those in another post.
Let’s create another shader file in the Unity editor, just as we have before, also create a material for it and assign our new shader to it. Call the shader SSOutline, the material SSOutlineMaterial. Apply the material to your model as we have over the past few posts.
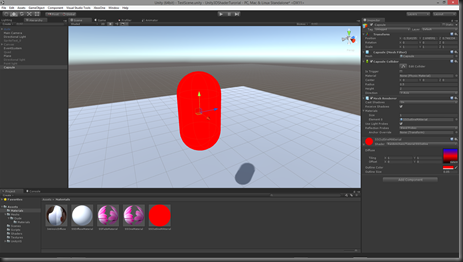
For simplicity I am going to create a Capsule and apply my material to that.
First thing we will do it take the code from our diffuse shader we did earlier and put it in our new SSOutline shader, it should look something like this now
Shader "Randomchaos/Tutorial/SSOutline"
{
	Properties
	{
		_MainTex ("Diffuse", 2D) = "white" {}

	}
	SubShader
	{
		Tags { "RenderType"="Opaque"}
		LOD 200


		// Geom pass
        CGPROGRAM
        #pragma surface surf SimpleDiffuse

        sampler2D _MainTex;

        half4 LightingSimpleDiffuse (inout SurfaceOutput s, half3 lightDir, half atten)
        {
			half4 c;

			half NdotL = saturate(dot(s.Normal, lightDir));

			c.rgb = s.Albedo * _LightColor0.rgb * NdotL;
			c.a = s.Alpha;
			return c;
        }

        struct Input
        {
            float2 uv_MainTex;
            float2 uv_Bump;
        };

        void surf (Input IN, inout SurfaceOutput o)
        {
            half4 c = tex2D (_MainTex, IN.uv_MainTex);
			o.Albedo = c.rgb;
			o.Alpha = c.a;
        }
        ENDCG
	}
    FallBack "Diffuse"
}
Pretty much the same thing we had before, I can now pass this shader a texture and it will be applied to my mesh like this.
Now, we want to be able to render an outline around this mesh, so we will need to be able to give it at least two values to do this, the colour of the line we want and the thickness. All we need to do, to enable the shader to take these two new parameters is to add them to the properties at the top of the shader.
I am going to have _OutlineColor to denote the colour of the outline (forgive me mixed spelling of colour, one is the English spelling, colour, the other is the American, color, the later is used in code) and I am going to have _OutlineSize to denote how thick I want the line to be.
	Properties
	{
		_MainTex ("Diffuse", 2D) = "white" {}

		_OutlineColor ("Outline Color",Color) = (0,0,0,1)
        _OutlineSize ("Outline Size", float) = .05
	}
I have given them the default values of black and .05 respectively. At this point we can still use and run our shader like this, but no matter what we do with those parameters it is not going to change what is rendered, this is where our second pass it used.
The second pass is effectively going to render the vertices again, only this time we are going to manipulate the vertex data in the vertex shader so that it draws the mesh slightly larger than the original mesh rendered, using the _OutlineSize parameter.
Then in the second pass surface shader, we are going to render the mesh using the _OutlineColor provided and have a lighting calculation that just render’s the line with no lighting calculations applied to it.
This is what this pass will look like, but I will go over the components and describe what is going on in each section.
		// Outline pass

        CGPROGRAM
        #pragma surface surf LineLit vertex:vert

        float4 _OutlineColor;
        float _OutlineSize;

        void vert (inout appdata_full v)
        {
            v.vertex.xyz += v.normal * _OutlineSize;
        }

        half4 LightingLineLit (inout SurfaceOutput s, half3 lightDir, half3 viewDir)
        {
			return float4(s.Albedo,s.Alpha);
        }

        struct Input
        {
            float2 uv_MainTex;
            float2 uv_Bump;
        };

        void surf (Input IN, inout SurfaceOutput o)
        {
            o.Albedo = _OutlineColor;
            o.Alpha = _OutlineColor.a;
        }
        ENDCG
First thing we do is let the render pipeline know we are starting a new CGPROGRAM, like before we set up the shaders to be used with a #pragma, but there are some differences here, what are they?
#pragma surface surf LineLit vertex:vert
As before, we are telling it our surface shader is called surf and that we will be using our own lighting calculation called LineLit, but we are also telling it that we are also using our own vertex shader called vert, rather than use the one Unity supplies for us.
        void vert (inout appdata_full v)
        {
            v.vertex.xyz += v.normal * _OutlineSize;
        }
Again, remember back to the first post we did when creating the data stored in the vertex?
// Set up position data.
positions.Add(new Vector3(-.5f, .5f, 0));           // Top left corner
positions.Add(new Vector3(-.5f, -.5f, 0));          // Bottom left corner
positions.Add(new Vector3(.5f, -.5f, 0));           // Bottom right corner
positions.Add(new Vector3(.5f, .5f, 0));            // Top right corner
This position data is stored in the v.vertex elements, remember this is a vertex shader, so each vertex on the mesh is set up ready for the screen in here and this data is no interpolated like in the pixel and surface shaders, it is the raw data in the vertex as it was created.
        // Create our own normals
        normals.Add(Vector3.back);
        normals.Add(Vector3.back);
        normals.Add(Vector3.back);
        normals.Add(Vector3.back);
Again, this normal data is stored in the v.normal for this vertex, and as with the position, this is the raw un interpolated data that is used to render the triangles on the screen.
In this vertex shader v is an instance of a predefined Unity vertex structure that will get populated by our mesh’s data. In this case it is using appdata_full, there are a fwe pre defined structures, but appdata_full has all the vertex data elements you are most likely to need. If you would like more information on these structures check out this Unity document.
So, in the vertex shader we are saying, move the position of this vertex in the direction of the normal (remember a range of 0-1 for each axis) by a multiple of _OutlineSize. This will result in the mesh being drawn again, but scaled by _OutlineSize.
The surface shader can then just set the Albedo and Alpha to the colour we have chosen to render the line in and the lighting calculation just returns the colour without any lighting calculations on it.
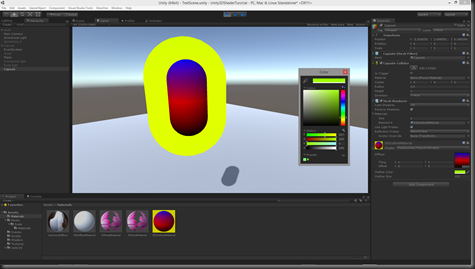
BUT, if we run this shader now, all we will get is a slightly bigger version of our mesh rendered over the first pass like this
How do we get this to be an outline of our mesh as opposed to just blocking it out?
Well, when the render pipeline draws triangles, it has a culling calculation so that any triangles that are facing away from it are removed from the render pipeline and so don’t need to be drawn. In the case of Unity this is what’s known as a backside cull, that is to say, any triangles facing away are removed from the pipeline, but we want front a side cull, how do we tell the shader, that for this pass we want to only see the back of the triangles?
Just before we start the CGPROGRAMM block for the second pass we can change some of the pipeline settings, so in the lines between my comment and the CGPROGRAM block we can set the cull mode to forward like this
		// Outline pass
        Cull Front

        CGPROGRAM
        #pragma surface surf LineLit vertex:vert

        float4 _OutlineColor;
        float _OutlineSize;
Cull has three settings, Back, Front and None. Back is the default, and None means it will render both sides of your triangles, so if you had something like a flag or a window and wanted to see both sides of the thin mesh you would use None.
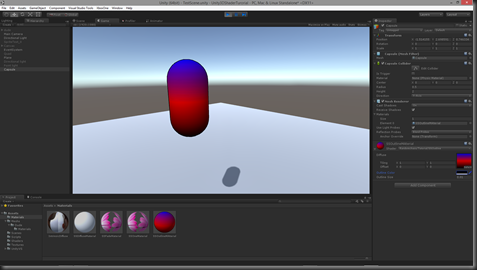
Our render now looks like this
We can now adjust the thickness and colour of the outline to suit the look we want.
Or on a more complex mesh like this
The whole SSOutline shader looks like this
Shader "Randomchaos/Tutorial/SSOutline"
{
	Properties
	{
		_MainTex ("Diffuse", 2D) = "white" {}

		_OutlineColor ("Outline Color",Color) = (0,0,0,1)
        _OutlineSize ("Outline Size", float) = .05
	}

	SubShader
	{
		Tags { "RenderType"="Opaque"}
		LOD 200


		// Geom pass
        CGPROGRAM
        #pragma surface surf SimpleDiffuse

        sampler2D _MainTex;

        half4 LightingSimpleDiffuse (inout SurfaceOutput s, half3 lightDir, half atten)
        {
			half4 c;

			half NdotL = saturate(dot(s.Normal, lightDir));

			c.rgb = s.Albedo * _LightColor0.rgb * NdotL;
			c.a = s.Alpha;
			return c;
        }

        struct Input
        {
            float2 uv_MainTex;
            float2 uv_Bump;
        };

        void surf (Input IN, inout SurfaceOutput o)
        {
            half4 c = tex2D (_MainTex, IN.uv_MainTex);
			o.Albedo = c.rgb;
			o.Alpha = c.a;
        }
        ENDCG

		// Outline pass
        Cull Front

        CGPROGRAM
        #pragma surface surf LineLit vertex:vert

        float4 _OutlineColor;
        float _OutlineSize;

        void vert (inout appdata_full v)
        {
            v.vertex.xyz += v.normal * _OutlineSize;
        }

        half4 LightingLineLit (inout SurfaceOutput s, half3 lightDir, half3 viewDir)
        {
			return float4(s.Albedo,s.Alpha);
        }

        struct Input
        {
            float2 uv_MainTex;
            float2 uv_Bump;
        };

        void surf (Input IN, inout SurfaceOutput o)
        {
            o.Albedo = _OutlineColor;
            o.Alpha = _OutlineColor.a;
        }
        ENDCG
	}
	FallBack "Diffuse"
}
As ever, hope you have found this post useful and if you have any questions or critique, please post them in the comments section :)
<< Previous Next >>


Thanks Charles, one of the clearest explanations of the outline effect I've seen. Was confused until you covered the importance of the culling change.
ReplyDeleteHey mate, glad you liked it :)
DeleteVery educative, thank you Charles :)
ReplyDelete